Flanking and indirect sound leaks
Sound flanking is the factor that most often causes soundproofing efforts to fail. Let's suppose you share a common wall with a neighbor that keeps you up at night, or perhaps you have an upstairs neighbor that has big heavy feet. Let's further imagine that you put 12 inches of lead on that wall or ceiling. That should solve the problem, eh?
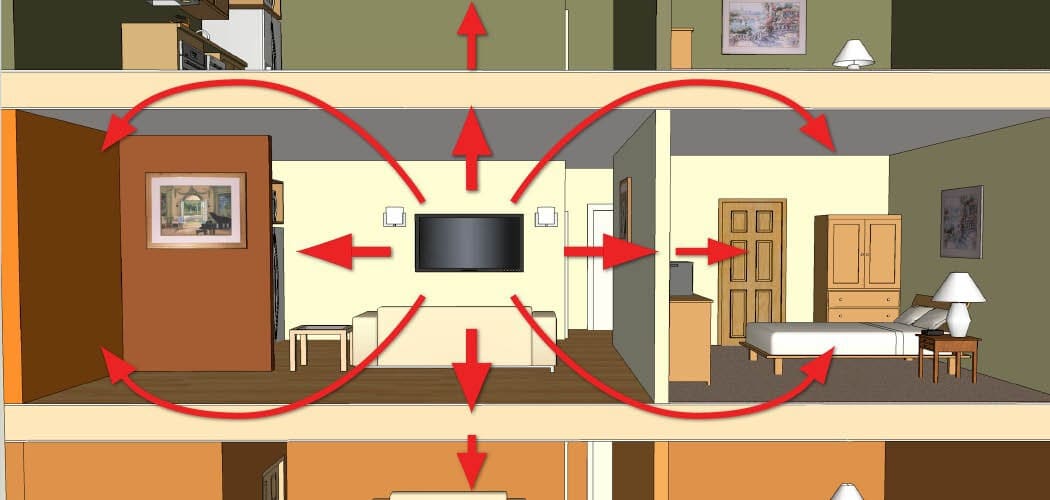
It might surprise you to know that you'll likely continue to hear that noisy neighbor. How can this be? Quite simply, the sound just went around the 12" of imaginary lead. This is what's known as sound flanking.
The sound will move from one room to another through direct and indirect paths. Some amount of energy will travel through or around a wall or ceiling.
It is important to understand that while sound can travel through air pockets like ductwork, stud and ceiling joist cavities, it can also be conducted along studs, joists, pipes, concrete and glass. Sound vibration uses a rigid surface to travel, like your voice on a string between two cans. The string is a conductor just like a stud or joist.
If I treat only one surface for sound flanking, am I wasting my efforts?
A common myth is that if you don't treat every surface, all of your soundproofing efforts will have been in vain. This is simply not the case at all. If you significantly reduce the sound passing through the one main wall, for example, that's great. What remains will likely be flanking noise to a fair degree. While every structure is different, treating the one main "direct" pathway will generally prove satisfactory for most people. This generally reduces the sound to a tolerable level, but will not eliminate it.
How to prevent sound flanking
There are a few common pathways where sound vibration often travels. The trick is to get creative and understand what pathways your flanking sound may travel and determine if anything can be done to reduce it.
General advice would be to assess possible flanking pathways before treating the single wall or ceiling. If there are too many flanking paths, the project may be bigger than you bargained for, and an acoustical consultant should be brought in. As always, if the project proves more than you can wrap your arms around, consider calling in a professional consultant from the National Council of Acoustical Consultants (www.NCAC.com).
You can get an idea of potential flanking using an inexpensive drugstore stethoscope. When the noise is occurring, have a listen to the main wall or ceiling, then listen to adjacent walls, floor or ceiling. Keep in mind that flanking sound will be reduced when you treat the main ceiling or wall. This technique will give you an idea of what you are up against.
Major flanking paths
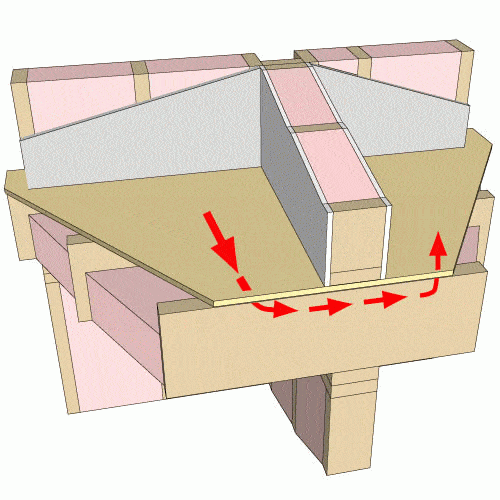
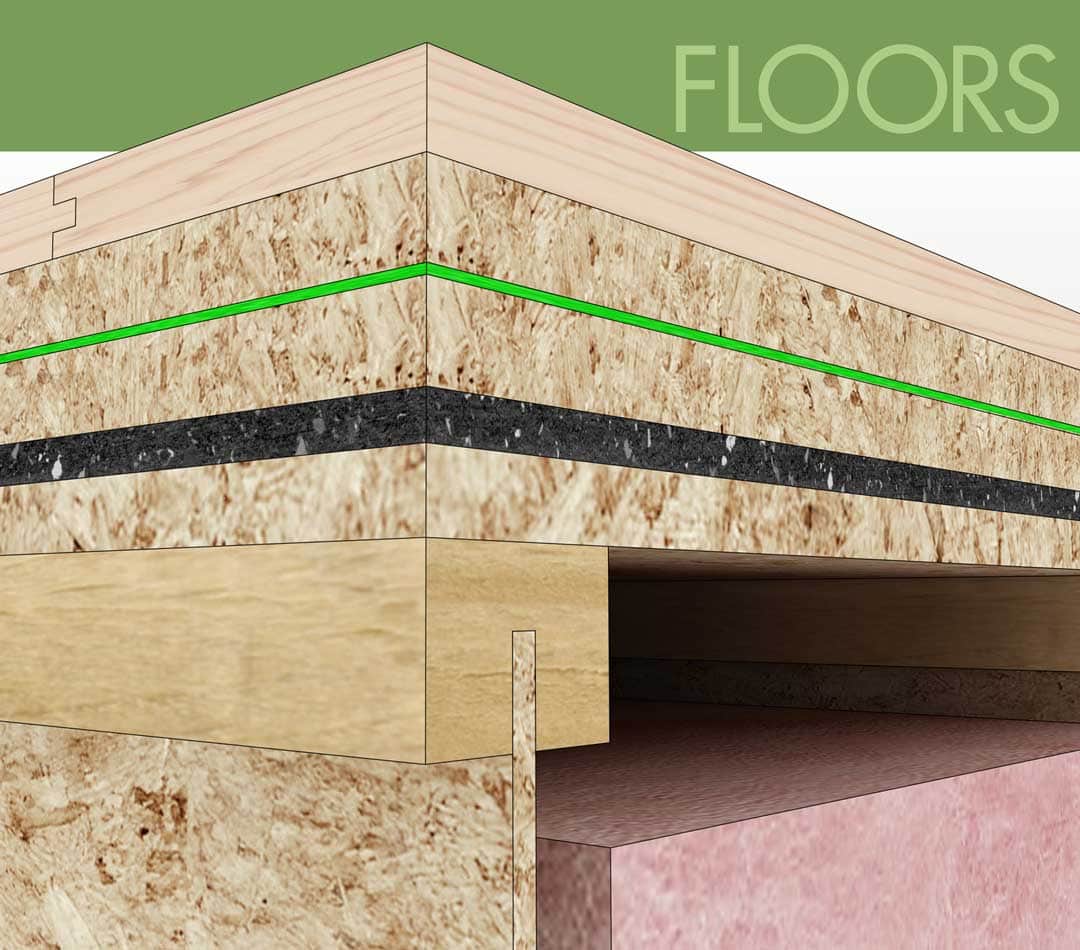
A common noise pathway is through the floor framing system under the wall. In some construction, there is a joist system that travels under the offending wall. The floor systems on either side of the wall are connected, so while there is no open-air path from his side to yours, the floor framing itself can conduct the vibration from his side to yours. This may or may not be a significant flanking pathway.
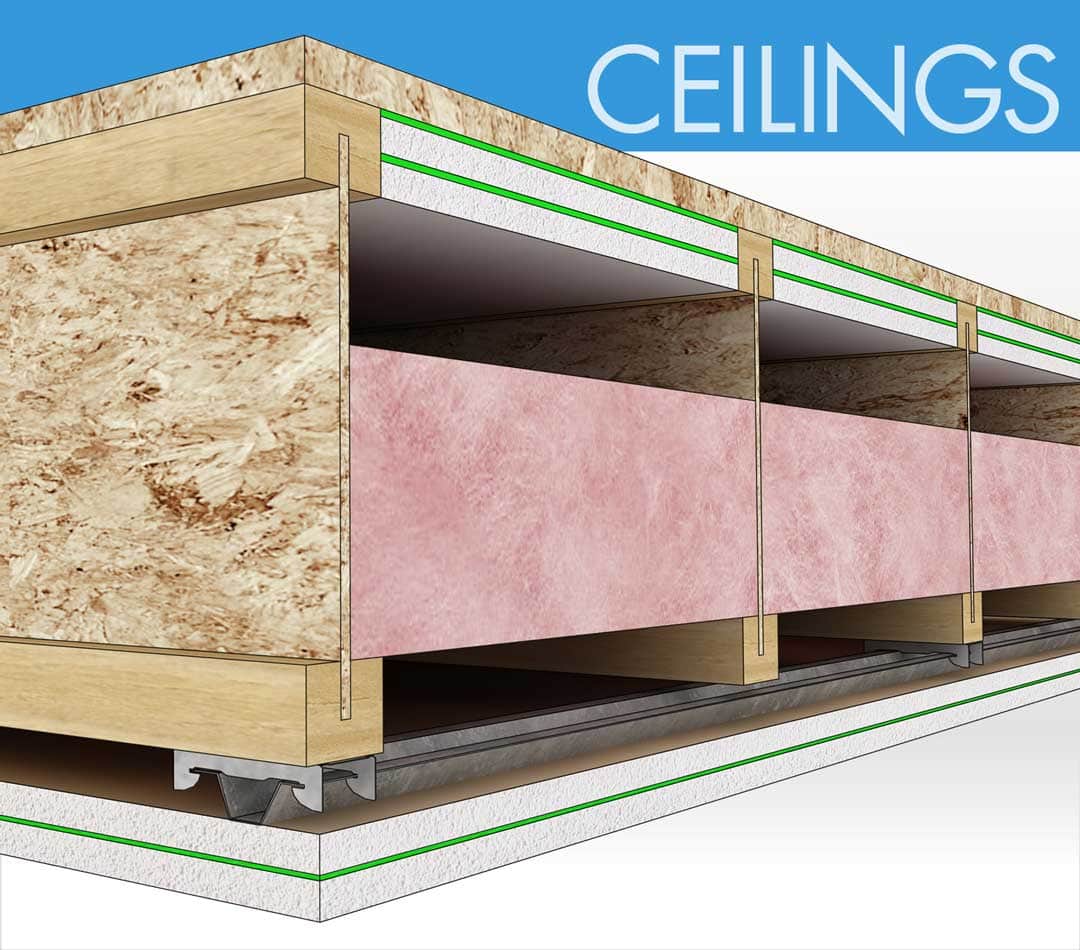
Another similar path is through the ceiling joist system. There are times when an attic area is common to both rooms. Vibrations from the offending room are transmitted through the attic air cavity or conducted through the joists themselves. You may need to consider the option of soundproofing your ceiling to achieve the soundproofing results required.
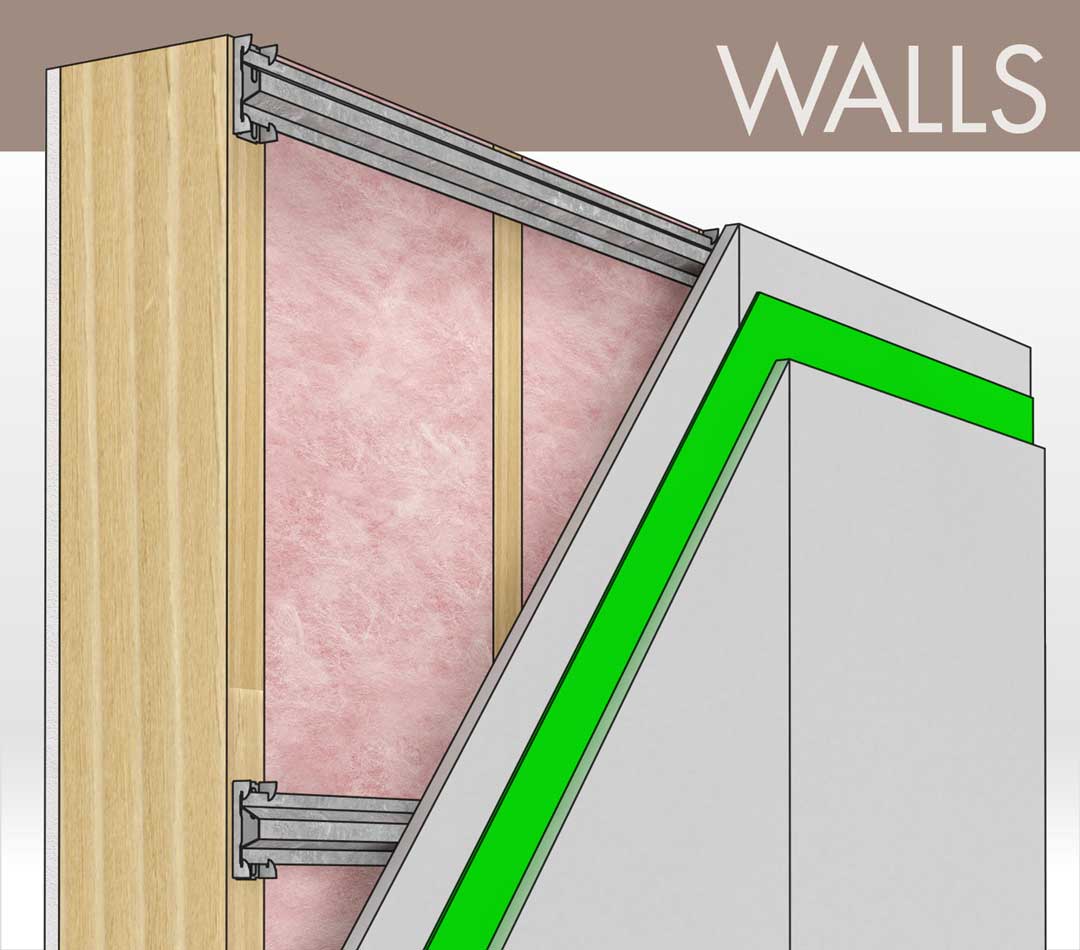
The last of the major paths is through sidewalls. The walls in your unit are usually directly connected to the walls in the unit next door. Take a look at soundproofing your existing walls for further information and suggestions.
Minor Flanking Paths
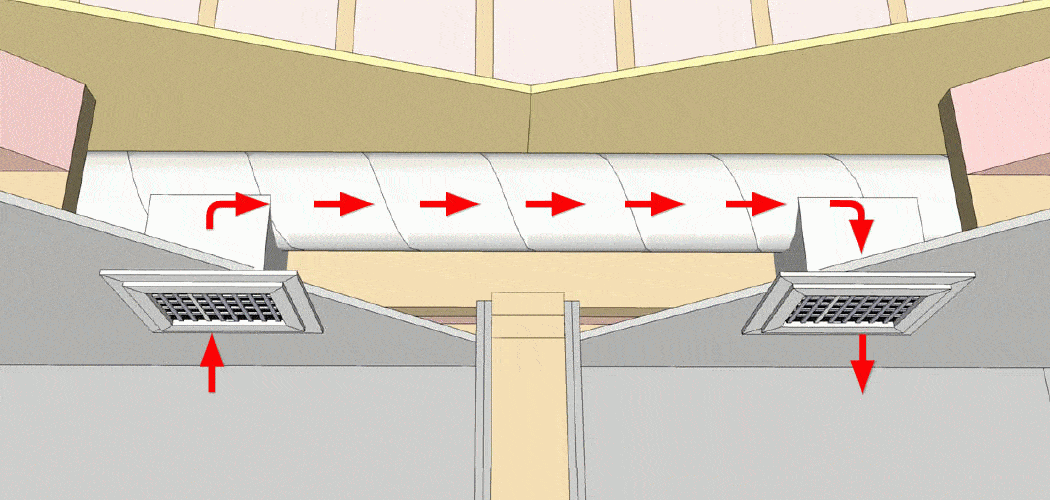
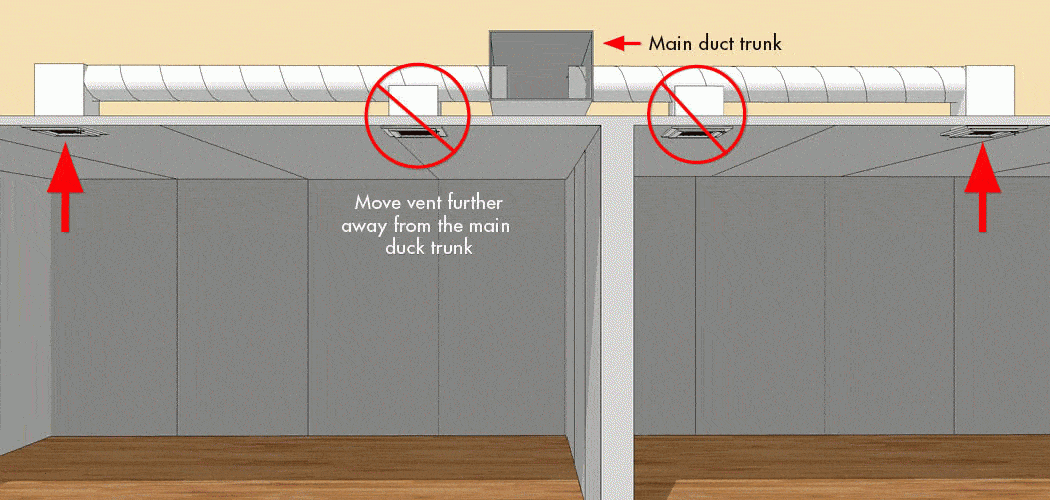
How many times have you been able to listen to a conversation going on in another room by sticking your ear by the air vent? Standard ductwork is metal, and therefore very conductive. Ductwork can, therefore, accommodate airborne sound as well as to conduct vibration through the duct itself.
Some things you can do to help reduce the effect of the ducts.
- Line the rigid ducts with a 1" compressed duct liner. Generally available through any Heating & Air Conditioning (HVAC) distributor. The duct liner is available in sheets and rolls. Add as much as you can install by reaching in.
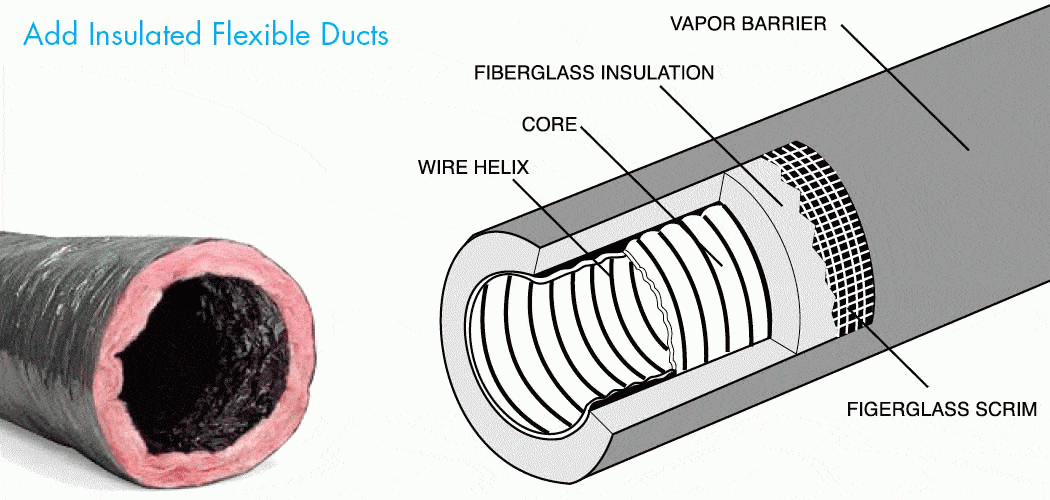
- If possible, replace the rigid ducts with flex duct. This round, flexible duct is soft and absorptive, and therefore not conductive at all.
- Introduce bends and s-shapes with the flex duct. Don't simply make a straight line. The curves encourage the airborne sound wave to bounce up against the absorptive lining of the flex duct, thereby reducing the noise.
Make the duct runs long as possible.
If an airborne sound within a flex duct has to travel 15 feet, more sound will be absorbed than if that same sound had to travel only 3 feet.
For dedicated rooms that will generate a great deal of noise, consider building a Dead Vent.
Pick the Right Doors
Whether residential or commercial, most doors are poor isolators of airborne sound. Two main reasons for the poor performance; poor seals and lack of mass in the door itself.
The door, or more accurately the door slab, is often hollow. Commercial steel doors or residential exterior doors are often filled with a lightweight insulator like Styrofoam, which helps with the heating bills but doesn't help much with acoustics. Fortunately, most hollow core doors can be exactly replaced with solid core doors. The difference in mass yields significant improvements. You will be faced with different slab core options such as particleboard filled, MDF filled or a mineral core. We recommend sticking with either particleboard or MDF since the mineral core is more expensive.
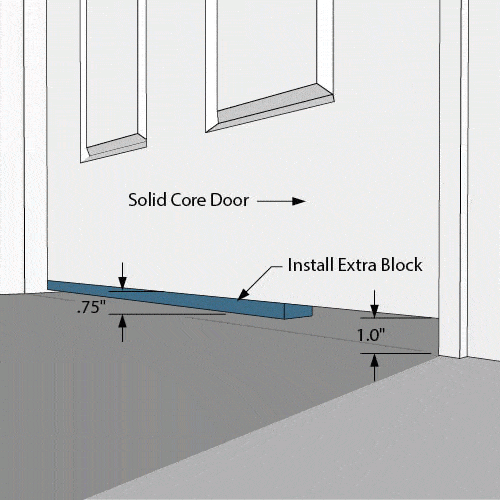
Now that you have a heavy door, you need to seal it. Standard door weatherstrip works well for the top and two sides of the door, but that big gap on the bottom of the door is too big for lightweight, thin weatherstrip. Consider installing a block to the underside of the door, then sealing with a door sweep. Alternately, you can remove the door casing (molding), cut the nails holding the door jamb, shorten the jamb sides by 3/8″ or so and thereby lower the entire door system.
Whether new construction or remodel, another option is mounting an interior solid core door slab on an exterior door jamb. A local door shop can accommodate this for you, though they are bound to wonder why you are mixing an interior door and an exterior jamb. Many door shops have come to understand that a standard hollow core door is superior to a solid core door because of the air cavity. While an air cavity can be good, the extreme lack of mass makes the hollow core door a really poor choice.
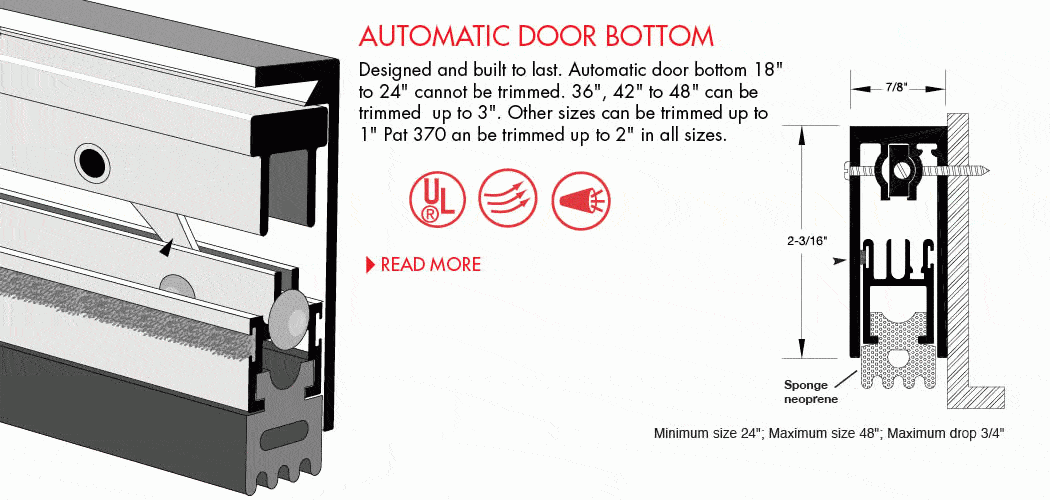
Another option is to install an Automatic Door Bottom to your door. This is helpful if you can't deal with the exterior jamb threshold or have a transition in height (tile to heavy pile carpet) that won't allow you to reduce the giant gap under that door.
Communicating Doors (Airlock Doors)
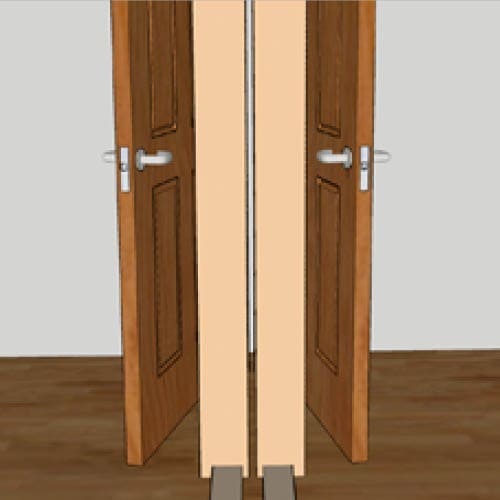
Despite your best efforts to seal the door, it will always be one of the weakest links. The wall construction is far more isolating than the door. The wall has more mass and no concerns about seals. One excellent way to help is to create a communicating door system. Two doors face each other to create an airlock. This works well when you have a wider wall such as a staggered stud or double stud wall. Note: You will need to accommodate the protrusion of the door handles.
Door and Window Jambs
One word of warning about doors (and windows). If you remove the door or window casing (trim molding), you'll likely find a big gap between the drywall and the door jamb. This is usually covered up with a light piece of decorative trim molding, but you would rather have the mass of the missing drywall. This isn't bad construction; it simply isn't optimized for soundproofing. Fill the gap with non-expanding foam or better, use some MLV and seal with caulk.
Seal up the outlet gaps.
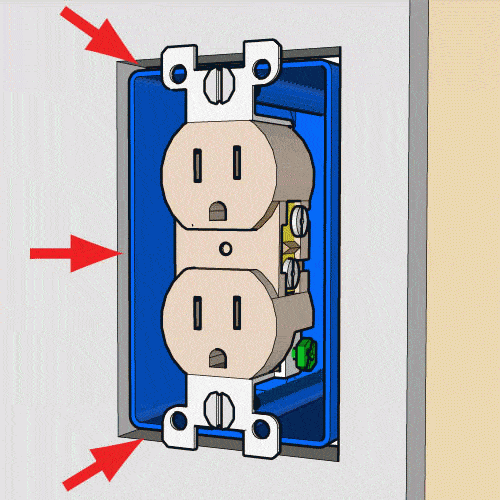
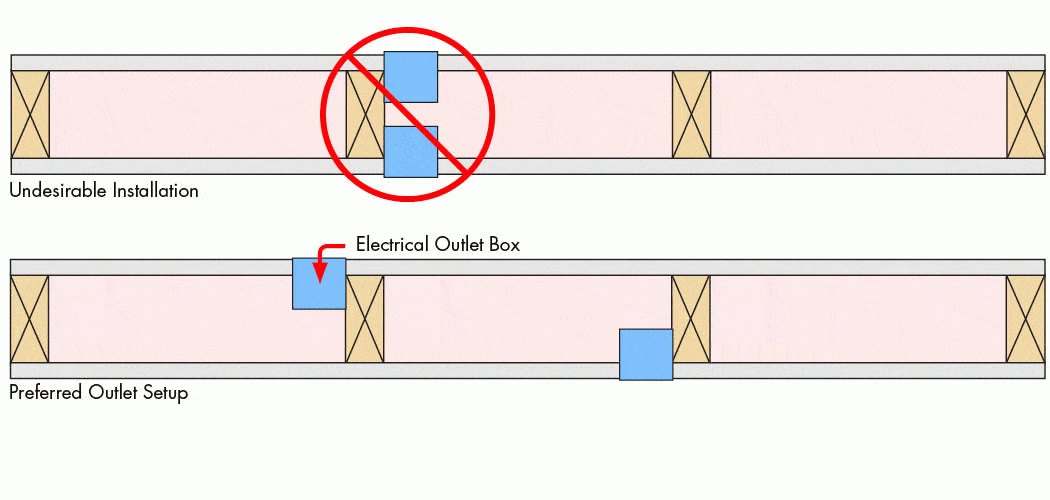
Outlets and gaps are all holes that can transmit sound, especially high frequencies. Use Putty Pads or Silenseal Acoustic Sealant where the drywall meets the outlet box.
The National Research Council (NRC) of Canada has done exhaustive testing of outlet placement and the potential reduction of soundproofing. The study IRC-IR-772 conducted by Dr. T.R.T. Nightingale concludes:
Avoid installing electrical boxes in the same stud cavity
- Seal the outside surface of the outlet box with a heavy putty pad, latex sealant, or use a plastic electrical box designed for use in vapor barriers (they’re sealed).
- Seal the junction of the drywall and electrical box with caulk or a foam energy-saving gasket.
- Make sure the wall in insulated and that the insulation is tucked in behind the electrical box.
Ceiling Can Lighting
We all love the look of the light from an array of recessed ceiling cans. Be warned that a great deal of sound will travel through these thin metal cans to the room above or from the room above. What can be done? You have 4 options:
- Remove them altogether. Consider track lighting or use wall sconces.
- Install ceiling can lights in wall soffits. This provides an opportunity to contain the sound that enters the can.
- Install backer boxes as seen here: Building and Installing a Backer Box.
- Use the smallest diameter ceiling can available, such as the Halo H-3, or 4″ All Pro Series.

